Greens on the Go…

*

Purslane Perfection

*

I eat my greens fresh, and every day; but, on occasion, I’ve had to go without because of a particular situation — travel/away from essentials, etc. Now, going without my greens for a day or two — well, I guess that’s not the end of the world, but if I don’t have to then why? ;^)

I do know many people are out all day long and don’t have access to a blender or space to make their smoothies, so they give up on them.

~*~

Well, here are a few tips to get those essential daily greens:

Manual juicer — excellent! Absolutely indispensable for travel. Good for hotels or if staying with relatives or friends. Makes no noise, is small and can be used almost anywhere — all that’sย  needed is a table or steady surface to attach it. Compared to electric juicers a real bargain, too. In fact, if one can’t afford a fancy juicer, a good-quality (stainless steel) manual is perfectly fine; and, in fact better than some of the expensive juicers, and should last decades.

Just crank and juice!

ย *

You can also take a small blender, if you’re going to be somewhere with access to an oulet, but don’t want to lug your big blender and juicer. Low-noise and work well if not stuffed with too much at once, it’s best to add, blend, add, blend, etc.

Tribest Personal Blender

*

*

Use Powdered greens

All over the internet; even in stores, there are all kinds of ground greens available now. There are also blends so you can buy just one item and have a bunch of greens in one scoop.

You can buy individual, too, such as spinach, watercress, etc.

Whole fruit/juice — even a stop at a mini-mart on the road will have some kind of fruit or juice

.

**

Dried fruit/ fruit powders — internet and stores too.

You can always dry your own when you have an excess ;^)

Dried/powdered vegetables for savory versions, or blended soups.

pea microgreens

A portable blender sounds pretty good — it’s no Blend-tec, of course ๐Ÿ˜‰ —ย  butย  may work on soft leaves like mache, microgreens, and baby spinach — would work for powdered, anyway. Good for camping ๐Ÿ˜‰

*

If you addย  nuts and seeds to yours, those are great traveling foods

*

Spirulina


I haven’t tried any of the blends, and I like simple so I usually do, spirulina* or chlorella, some spinach and a scoop of Matcha. I like the green algaes in my GJGS’s, but don’t use them daily/as often as I used to. They are great traveling greens, though :^)

I like Glaser Farms Spirulina; its flavor is very fresh and clean. Comes in a nice glass jar, .*

Good quality from MRH’s Chlorella (and spirulina); and, I also recommendย  HP’s chlorella

Algaes are very potent, so only small amounts are used.

**

Algaes make your smoothies a deep rich dark green ๐Ÿ˜€

*

But you do not need an appliance — blender, juicer or other gadget:

You can take bottled juice, shake in some dried green powders and have a delicious GS on the go or when staying in a hotel or as someone’s guest, perhaps.

*

Another option I’ve read that some folks employ for short trips for the day — freeze a pre-made smoothie and take it with (I would freeze it in a solid block for slower melting); it would be melted but still icy cold to drink by feeding time.

~***~

baby bok choi, flowering


Eating your greens whole, or slurping them blended and juiced is ideal; and you don’t want to rely on powdered greens, of course. But, occasionally, we need alternative ways to get them. And, heck, if availability of leafy greens is scarce in your neck of the woods, dried or powdered is your ticket!

There is such a variety, too, that there are greens for everyone. The packaging for freshness is so good now, too; plus the freeze-drying method, sun drying or low-temp drying, etc. make them almost, if not as nutrient rich as their fresh form.

No excuses, Y’All ;^)

Beloved Broccoli forever stay - into my salad every day ๐Ÿ˜€

So small yet so powerful, the broccoli sprout!

*Remember this:

Greens are the *KEY* to destroying cravings.

Greens are what demolished my cravings. I have zero cravings. Really? Yep. Really.

They nourish you so well, that your body becomes what it was meant to be —

Cue “6 Million Dollar Man” themeย  OR… ๐Ÿ˜‰ย ย ย 

— a perfect self-healing, self-sufficient, most-awesome-living-thing-on-this-planet- M_A_C_H_I_N_E — going after what it needs to survive — nutrients — destroying deadly cancers and other evildoers in its path like a Green-inator, leaving in its wake, vital organs and nutrient-rich cells *intact* and thriving.ย  YOU, too, can be rebuilt —

better

stronger

faster! ๐Ÿ˜€

/cut music/ย  ๐Ÿ˜‰

AND your body won’t signal what you perceive as cravings “false hunger”). Why?ย  Because it does NOT want junk.

Greens are the oils that lubricate your gears! They’re the premium fuel that runs your engine, clean. They are the spinach to your inner Popeye.

Don’t have greens once in a while.

Don’t have a “handful” of greens in your smoothies

Don’t have greens as a phase —

Greens are a food you shouldย  — no, have to —ย  eat daily for the rest of your life.

They are the ULTIMATE HEALING FOOD. Make no mistake. Get ENOUGH.

~ *** ~

Buckwheat Lettuce/Microgreens

Eat ’em raw, blended, juiced and stewed,

They aren’t sides or condiments, leafy greens are FOOD!

Slice ’em, dice ’em —ย  heck, chiffonade

Any way you can get ’em;ย  Don’t be a clod. :p

Simmered, creamed, chopped and steamed — they satisfy more than you ever dreamed.

Fill up with greens, andย  get yourself lean.

Good for your body and the ol’ bean ๐Ÿ˜‰

Flax Microgreens


Saturate your cells with nutrients galore

and strong mind and body will be yours evermore ๐Ÿ˜€

Let the healing begin!

Photobucket - Video and Image Hosting

Poxacuatl

*Note the caution at the bottom MRH’s spirulina page. As always, do your research.

Sesame Butter/Tahini Redux…

I tried making tahini with unhulled sesame seeds in my 2007 VitaMix. Disaster. I literally spent 46 minutes — yes, I timed it — trying to get it to work, continually scraping and blending, etc.

Here are some pictures on how to easier identify hulled from unhulled:

white-hulled-sesame-seeds_ (12) - Copy

“hulled,” “shelled,” white sesame seeds

Brown_sesame-seeds_unhulled_soaked - Copy

“unhulled”, “unshelled,” “whole” “brown” sesame seeds

**

white-hulled-sesame-seeds_ (8)Hulled sesame seeds have their outer shells removed. They are sometimes referred to as just sesame seeds or as “white” sesame seeds. This makes the smoothest butter, or “tahini,” and is what is most often found creamed, jarred in stores.

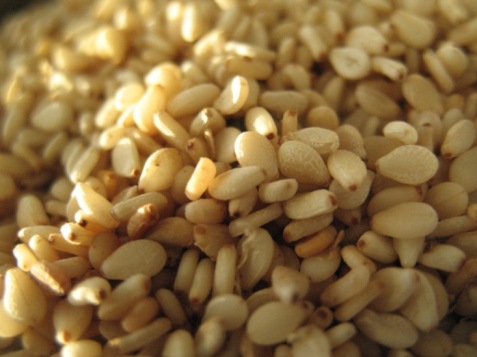
sesame-seeds_quarter-cup (3)Unhulled sesame seeds maintain their shells. Referred to as “brown” sesame seeds or “whole” sesame seeds. More nutritious than white, they also carry a bit of bitterness from their shells. Rinsing and draining alleviates much of that tannic flavor.

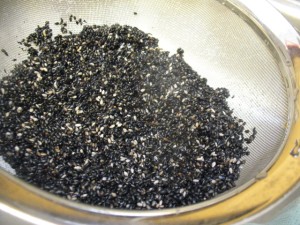
The third type of sesame, is the beautiful black

Black-Sesame-Seeds_quarterC (6) - Copy

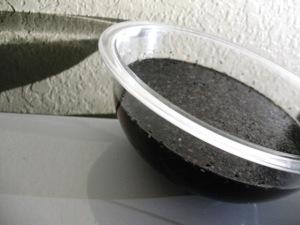
Black sesame is the most nutritious of the three. It tastes slightly different; some think it’s stronger.

**

tahini_homeprepared_white-sesame

Hulled sesame butter is easy peasy and is actually done quite easily in a food processor, as I demonstrated previously. Above, you see it makes a nice thick butter. The easy flowing tahinis you find in stores have oil added.

Unhulled, with the VitaMix, proved more difficult (The following were unhulled, soaked, with and without added water):

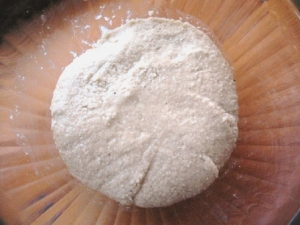
tahini-Brown_fini (3)

This is actually not too bad even with quite a bit of texture; but it still has a lot of whole seeds.

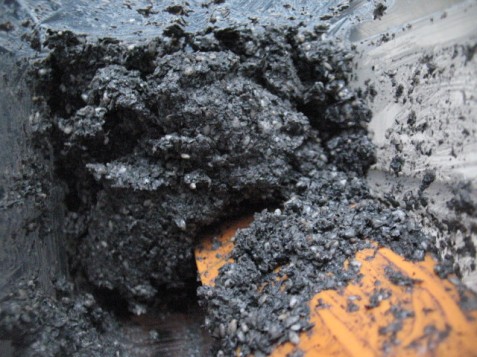
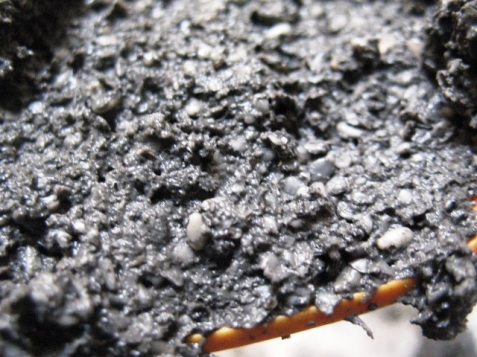
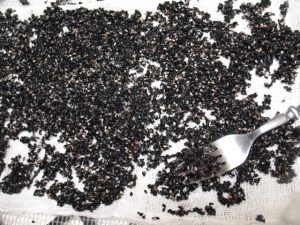
Even tried with unhulled black sesame seeds (VitaMix):

black-sesame-scrape-blender (6)

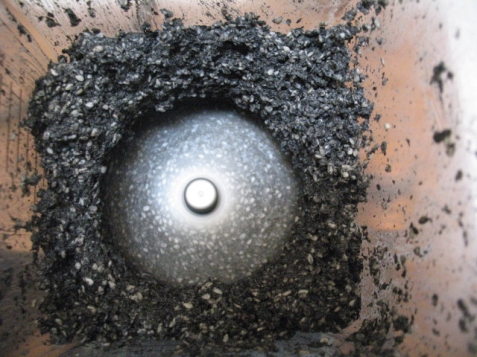
Tried with my dependable Blendtec…

black_4

Nope…

black_12

Still lots of whole seeds thatย  just don’t want to blend!

However, the good news is, it’s not really so big a deal to have some texture,ย  depending on your recipe. You can still use these chunky butters! If, for example, you are making a dressing or hummous, it will blend up quite nicely with the other ingredients, and it seems to lose its texture. I made aย  dressing with it and it came out smooth.ย  But this shows why the nut and seed butters in stores contain added oil — though they do not have to list it as an ingredient — they need it to get that creamy smooth texture. It’s a similar process with my precious, beloved ๐Ÿ™‚ย  coconut BUTTER (It is not oil ย though Artisana says they do not add oil to theirs),ย  oil is added to coconut and other butters in order to cream them because some are VERY, VERY fibrous; and it is impossible to get a creamy emulsionย  simply blendingย  (confirmed via email on several brands, despite how the advertising “sounds”) I’d like to try, however, in my juicer sometime…hmmm…:)

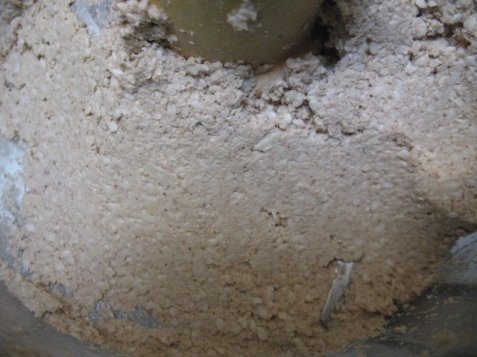
Next, I decided, against the odds, to give the processor a try

10

No go ๐Ÿ˜ฆ

*

~ My recommendation is to not add water or liquids to any, which includes not using wet, soaked seeds ~

The water diminishes the flavor and, in my opinion, does something…well, weird ๐Ÿ˜‰ to the texture.

*

Okay, now here’s the zinger —

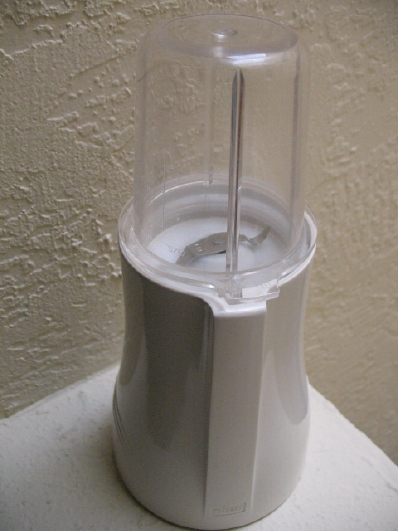
Tribest_personal-blender (3)

My little Personal Blender did a better job!

Check it out…

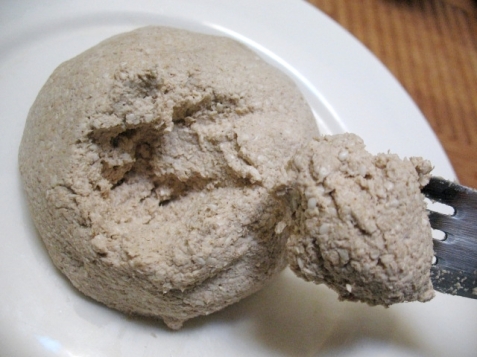
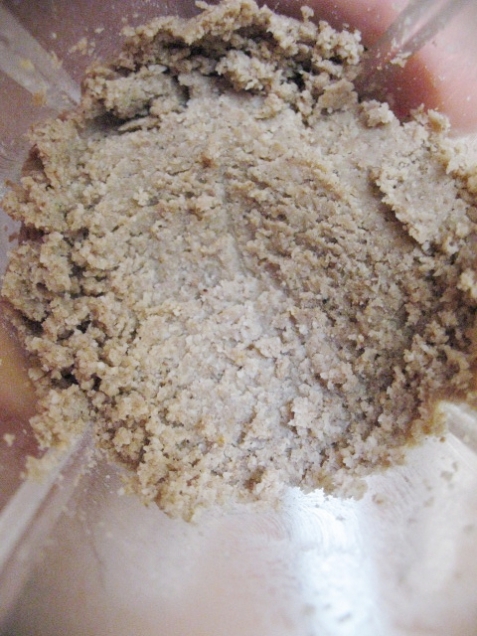
Results for unsoaked, unhulled dry brown sesame seeds…

brown-sesame_tahini_sm-blender_no-soak_fini (3)

Pretty darn good! Whoa, much better than the power blenders. No whole seeds left in just a few minutes of blending!

Of course, it makes small amounts only. This is actually better, in my opinion, because it’s not good to keep buttered seeds and nuts stored for long periods anyway. This way, you can make and use small amounts and not have to pay high prices for a large jar, when you only really need small amounts.

The Personal Blender, aka “Tribest Personal Blender” is similar to a “Magic Bullet” and other such small blenders. They are even less powerful than some coffee grinders! If you have such a blender or smallย  grinder give it a try.

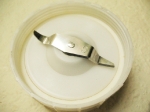
flat-blade_blender~ Be sure to use the flat blade for buttering. ~

Now, don’t expect it to be exactly creamy smoothย  like the storebought UNLESS you add oil. And, really, unhulled seeds are, naturally never going to render as smooth as hulled because they have all their fiber in the stead of more seed and oil. Even my store-bought black tahini isn’t completely smooth, and, in fact, one manufacturer even states that because it is unhulled, it is not as smooth (can’t recall which brand that was).

~ * ~

NOW, I don’t particularly like the idea of not pre-soaking because there is the bitterness in the brown sesame hulls, which some don’t like (and which may contribute to inadequate absorption of its nutrients). So I thought I’d try soaking and sprouting to see if this improved the small blender tahini texturally and flavorwise.

The good news about sprouting sesame is that it takes only a few hours of soaking! SproutPeople instructs as short as 2 hours and up to 8. Since they are small, you don’t want to drown them ;). They also say that just the soak and allowing them to dry is enough to remove the enzyme inhibitors, meaning you don’t have to do the rinse, drain, rinse drain over days to get increased nutrition and remove most of the bitterness, and if you don’t want to sprout them. I decided to soak for 4 hours and sprout them at least a full day, then let them dry. (Note: white, hulled sesame seeds cannot be sprouted)

So it went like so:

Soak for 4 hours.

Drain, rinse; spread onto cheesecloth or other sprouting surface to sprout. Be sure if your surfaceย  has holes such as a mesh, they are not too large that the tiny sesame seeds fall through! You’ll be very frustrated (and curse me!) if you lose them all on the floor ๐Ÿ™‚

Rinse and drain as needed (depending on environmental/weather conditions) 2-4 or more hours till bedtime.

Just sprout until you see a tiny tail emerge or a small bud. They get bitter very quickly; so the smaller the sprout the better.

Let them dry out, and use right away, or store in the refrigerator and use within a couple days. You can also thoroughly dry them with a dehydrator and keep for long storage. I’d probably leave them in the fridge or freezer, but if *completely* dry can be kept in a cool, dry place.

*

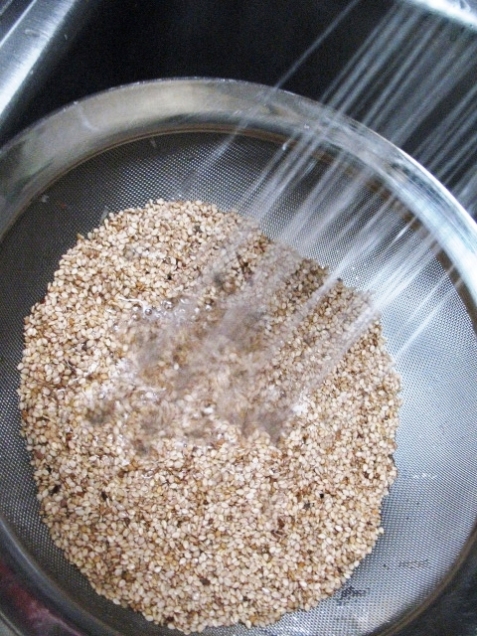
Rinse

sesame_unhulled_rinse (2)

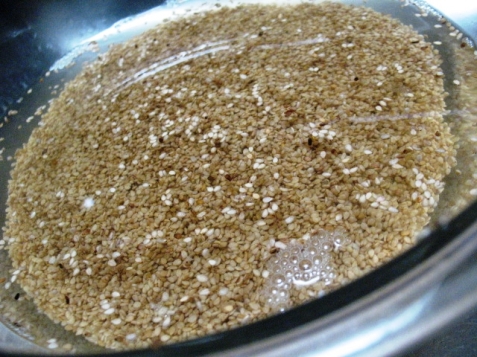
Soak for 4 hours…

sesame_unhulled_soak (3)

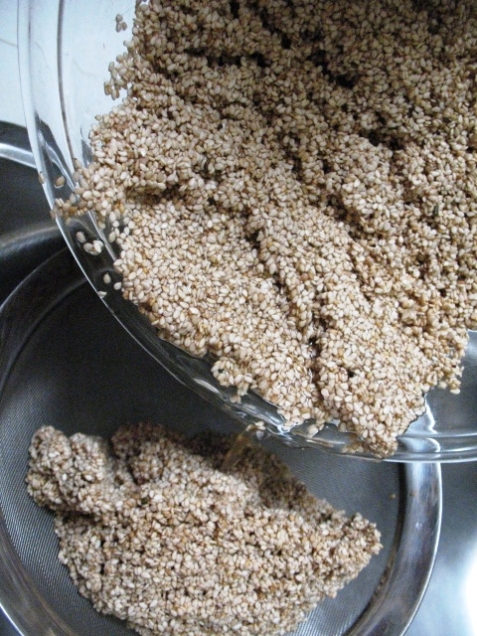
Drain

sesame-unhulled_drain

Then rinse well again.ย  Final drain….

Brown_sesame-seeds_unhulled_soaked (19)

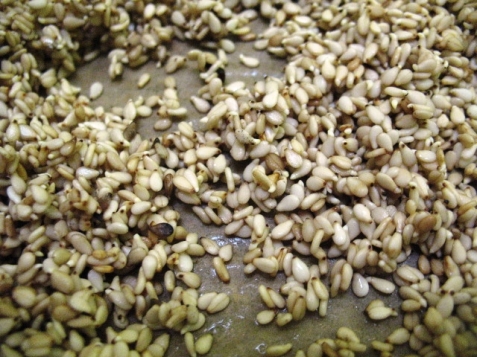
Spread out to sprout for 24 hours or till tiny sprouts or buds appear…

Sesame_sprouts

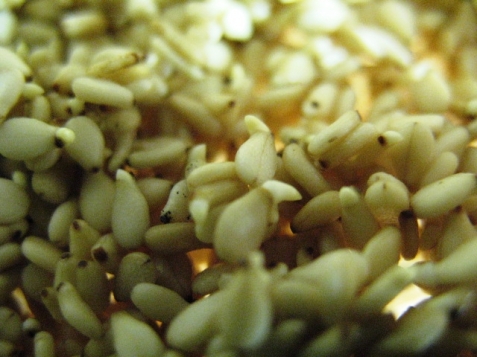
Here’s a closeup…

Sesame_sprouts (9)

Cutie little sprouts! ๐Ÿ˜€

Same for the Black…

Rinse

black-sesame_rinse (2)

Soak

black_sesame_1-C_soak (5)

Drain

black-sesame_drain (3)

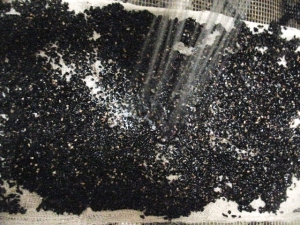
Lay out to sprout –here I used cheesecloth:

Black-Sesame_soaked_sprout_cheesecloth (3)

Rinse

black-Sesame_sprout_rinse_cheesecloth (2)

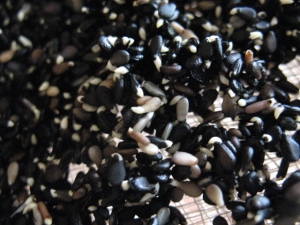
Sprout…

Black-sesame-seed_sprouts (4)

closer look :D…

Black-sesame-seed_sprouts (9)

Black Beauties!

Dry

After that final rinse, they should be left to dry out before blending or before storing.

If you wish to speed up drying after the last rinse, then you can put them outside (make sure it’s not windy!), covered, or in a place with good air flow. I like to dry my sprouted seeds in the dehydrator at a very low temp — like 80- to 90-degrees — which is just quicker and more convenient.

Okey Dokey, now they’re ready! Let’s see what happens…

Into the small blender with the flat blade go they…

Blend ‘er up…

Couple a scrape downs…

and…

unhulled-sesame_sprouted_fini

Excellent! Within seconds, all the seeds are blended. They seem to have benefited from the sprouting process, as well: The taste was better, having rinsed and sprouted off the bitterness.

Only stones left unturned — I tell ya, this has been a pain! — now are, one, to try large batch of sprouted and dried seeds in the power blenders, and, two, giving the power juicer a whirl.

So here again are the keys to good-tasting, creamier unhulled sesame butter or tahini:

unhulled-sesame_sprouted_fini (2)

Organic, fresh whole unhulled seeds

Rinsing

Soaking

Sprouting*

Drying, thoroughly

Creaming in small batches

Using a small blender with the flat blade

*If you don’t want to sprout, it will still work (as I demonstrated above), following all the other steps, but will render a more “toothy,” textured butter: It will not leave any whole seeds.

There you go. Mystery solved ๐Ÿ™‚ The rinky-dink little blender out performs the power blenders! Enjoy your hulled white OR unhulled, brown, or black, home-prepared sesame butters and tahinis!

Strix

Photobucket - Video and Image Hosting

Barbie Bread — Homemade Essene Bread, More Sprouting!

my-monukka-essene-bread_fini-69

Monukka Essene Bread


Recipe at the end of this post ๐Ÿ™‚ย  ( Also see Sweet Cherry Essene recipe )*Essene, (aka “manna,” is aย  Dr. Fuhrman-approved breadfind at end of recipe instructions* You have to go through my ramble on sprouting (and OF COURSE my going off track…slightly ๐Ÿ˜‰ ) the whole-grain berries to make this bread.

Essene bread is an ancient, sprouted bread. It is much different, however, from what we consider bread today. It goes by other names — Manna bread, raw bread, etc. — all the same thing ;^) There is a brand name, “Ezekiel,” but one should read the label(s) to double check ingredients on any brands claiming “raw,” “live,” or “sprouted,” etc. breads.

It is extremely easy to make, from its most simple form — just grain, which is the original — to various additionals, flavorings, herbs, etc., for more modern palates. Some get carried away — be careful ๐Ÿ˜€ —ย  but, by all means, do add vegetable/fruit or their pulps; or other fromย  juicing ๐Ÿ™‚


It should, however, be void of preservatives, sugar, salt, other unwholesome additives, and yeast. It is also very quick to make, which is a bonus. It can be made sweet or savory, both usually containing the traditional raisins or you can use other dried fruit.

It is sometimes referred to as “raw” bread, but most of the Essene breads eaten nowadays are storebought; and the majority are baked at @ 250-degrees, rendering them un-raw. One may be able to find a “truly raw” bread in some stores, as the natural and “raw-food” food movements has become more widely commercial. The packaging will indicate if it is truly “raw,” as that is a selling point; it’s usually produced by a merchant specializing in “raw food.” It will state at what temperature the breads were baked/dehydrated.

Essene breads store very well; and you can freeze them if making in bulk. Additionally, you may freeze your sprouts, too, (or even dehydrate-see pics)ย  for use later, to make these even more convenient.

If you have never had Essene bread be aware it is not going to be like traditional bread — it is moist and chewy and has a very particular flavor from the sprouted grain. It is a “raw” flavor. The the longer and the higher temperature at which it is baked, however, the more bread-likeย  it tastes. It is surely an acquired taste ๐Ÿ™‚

If you try Essene bread, however, and don’t like the texture, moistness, or “rawness”; you can simply dehydrate till crunchy OR bake them at higher temperatures.

The Essene bread “doughs” benefit from sitting a while to develop flavor, just like one rests and rises yeast breads. Just don’t let it sit too long ;). This is another reason dehydrating can be tastier.

I’ve mentioned previously that I have a lot of drafts on sprouting, and other things, which I haven’t gotten to! But, since my fellow nutritarian enthusiast, Barb, (aka, Kneecap, aka Vegan Barbie) over at HealthyVegan likes a little Essene bread now and then, I figured I’d put up this post to show how easy-peasy Essene can be!

Ha…this post is sorta funny…I don’t eat grains any longer, but I do make this (and other things I don’t eat!) for family — the athletic types in the group like these better than “power bars” :). Actually, I never made Essene bread for myself, even pre-healthful eating through ETL…I was too toxic from a bad carb addiction to mess around with healthful “bread”! I was into the crusty (or chewy) topped white bread…Ugh! Okay, we won’t go there now. Even though not my thing, I hope this blog post will be helpful for those interested in healthful breads and wraps with wholesome grains. ๐Ÿ™‚

NOTE: My recipe calls for really blending this till very smooth. Many use a juicer to get the best texture. If you have one, of course use it; but a power blender works fine. Also, my pictures do not show the Essene “dough” completely smooth, as the persons this is made for like it textured. But, generally, the batter should be smooth as you can get it.

=========

NOTE: Also remember: You can make this to your taste buds! Use any tasty grains/ingredients you wish! This is a great base from which to sprout your creativity ๐Ÿ˜‰ Add whatever extras — dried tomatoes, carrot or other vegetable pulps, various nuts and seeds, vary the texture — it’s endless! Read the ingredients labels of your favorite brands and make your own for pennies.


ALSO: please remember to use very good, fresh ingredients: With so few, it really matters! Use good quality to get good quality.

Sprouting, period, is simple; so berries are no different. Here are some samples and directions:

These are Amaranth seeds: Place in a clean jar, add fresh water and soak…
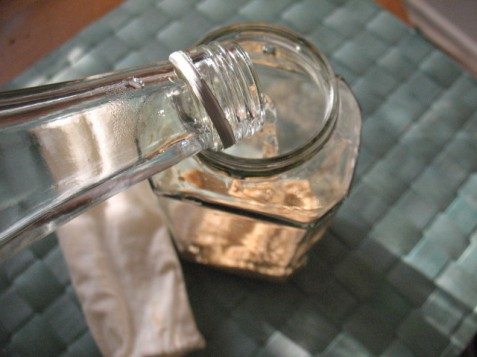
img_0088

Amaranth, soaked — Isn’t it pretty! this is soaked, drained, and rinsed amaranth…
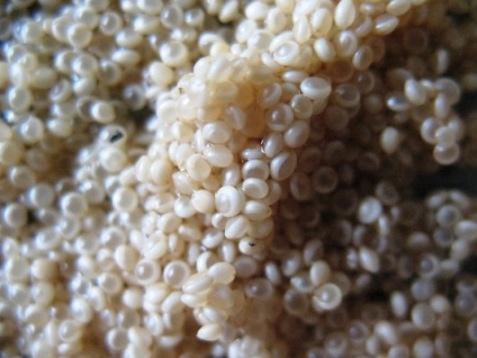
amaranth_soaked_honeycomb-copy

Here they are, the lovlies :). Amaranth Sprouts!
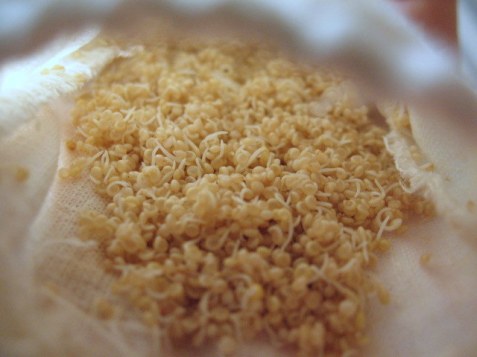
Amaranth

Beautiful, aren’t they? Amaranth sprouts fairly quickly, too…just fyi…Sprouted in my hand-made hemp bags :D…
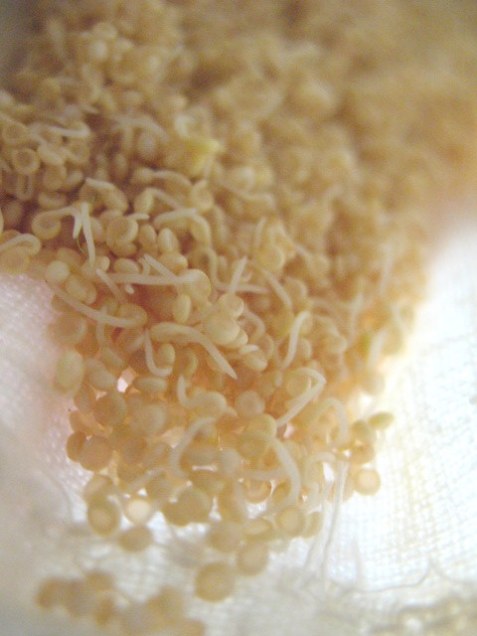
amaranth_young-sprouts_closeup1

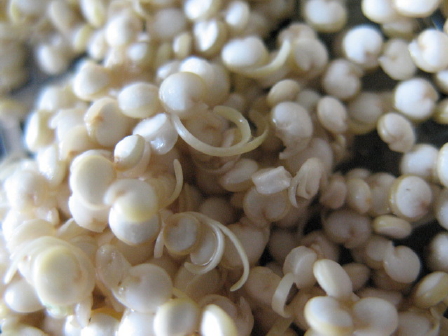
Same deal for other grains: Here is quinoa, sprouted….
quinoa_first-sprouts_-7

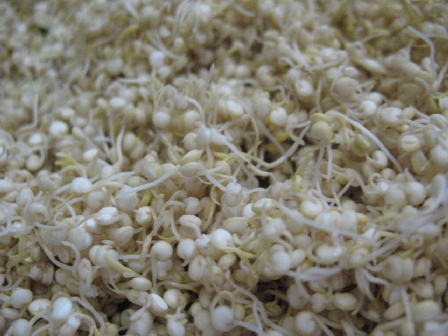
Here, their tails got longer (conditions will determine speed of growth)…
quinoa_sprouts_ready-3

~

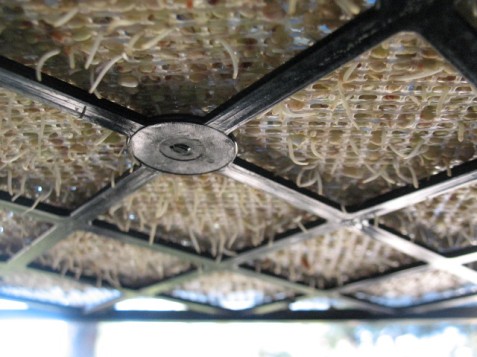
I sprout sometimes on my dehydrator trays! The mesh has nice sized holes to let air flow through, and, as you see, these buckwheat sprout roots grew through the bottom…
buckwheat_sprouts_rejuvelac

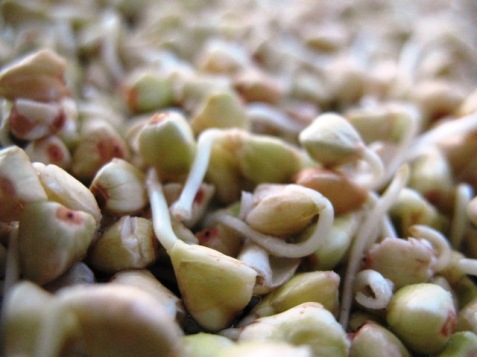
Here are the beautiful buckwheat sprouts…
buckwheat_sprouts_rejuvelac-22

~

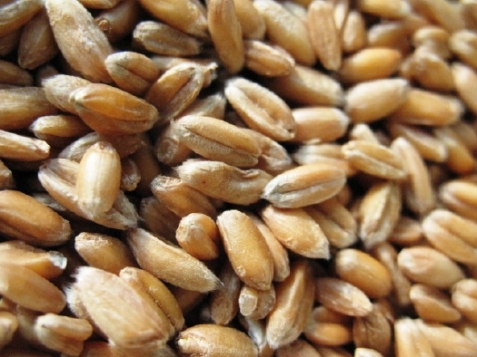
Essene is made with berries from the wheat family, so, whole-grain wheat, kamut, and spelt are a few.

Here are some Spelt berries, dry…
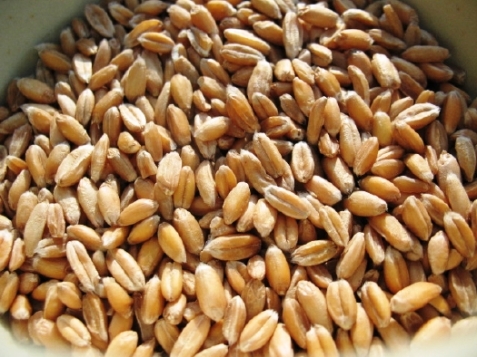
spelt-berries_dry-5

~

spelt-berries_dry_closeup

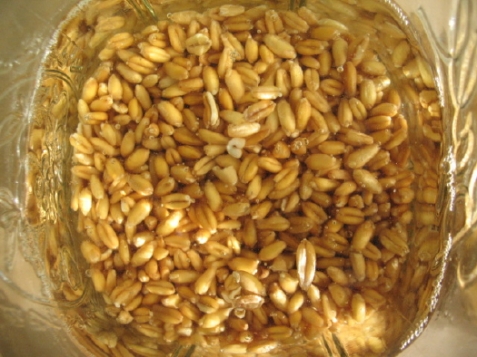
Just soak ’em…

spelt-berries_soak-3

Couple days later, Voila! Spelt Berry Sprouts…
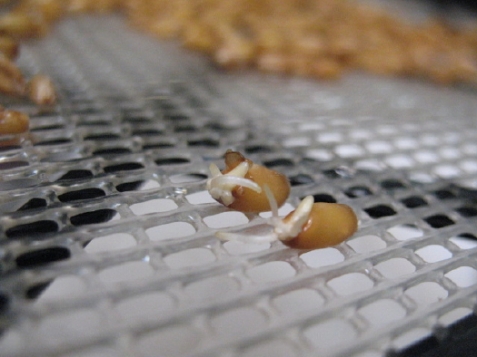
spelt-berries_sprout_dy2

===============

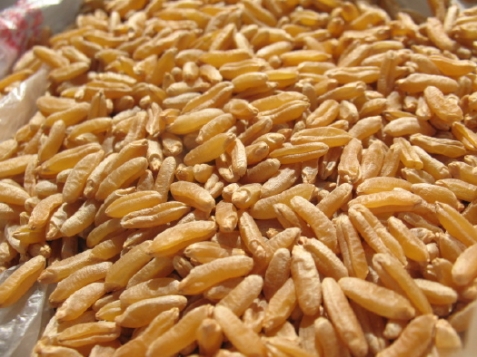
Kamut Berries, Dry: These are so gorgeous. I love the color of kamut. It’s an Amber (one of my favorite colors ๐Ÿ™‚ )..

kamut-berries_dry-15

Kamut is my choice for an Essene. Combined with spelt and rye makes a delicious combo, too; and of course, you can get as creative as you wish, using any grains. Experiment, experiment ๐Ÿ˜€

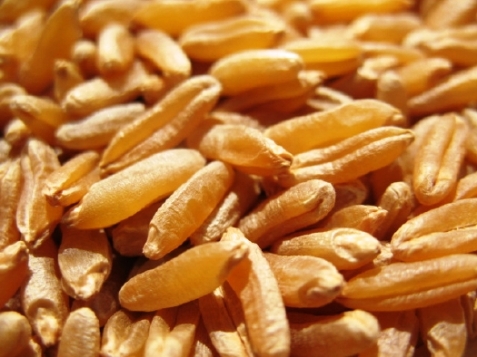
Kamut is a member of the wheat family (spelt, as well). Closer look ๐Ÿ˜‰ :

kamut-berries_dry-closeup

Soak kamut 6-12 hours (overnight makes it easy)…
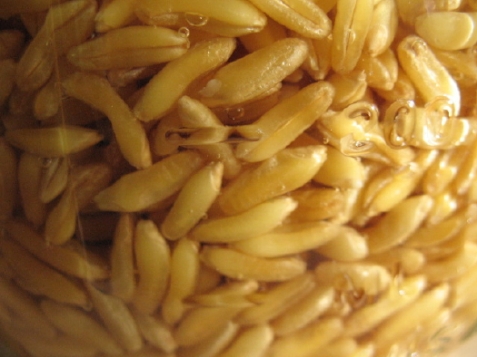
kamut-berries_soak-2

Drain, Rinse, then lay out on a tray…
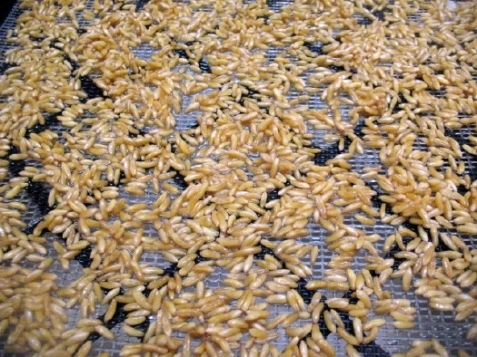
kamut_sprout

…and rinse and drain them every 8-12 hours (usually about 2-3 times) (minding weather conditions)

~

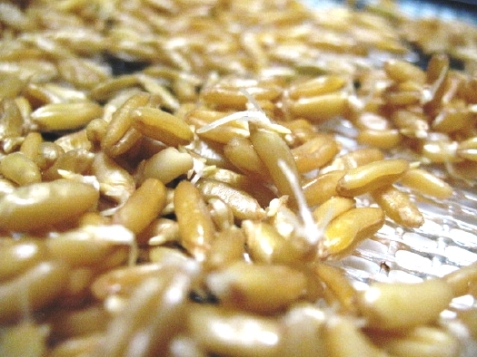
Kamut Berry Sprouts Day 2
kamut_sprout_dy2-21

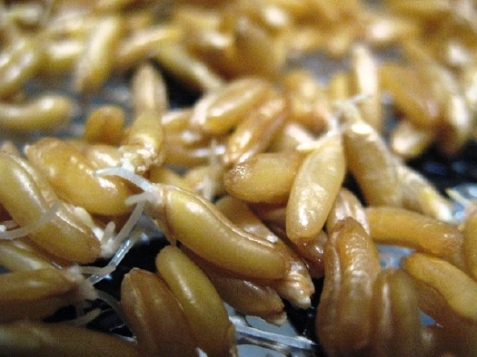
For Essene Bread, where you stop growing is debatable: Some say the tail should be twice as long as the berry; others say just as long as the berry, or equal in length to the berry. Grain sprouts get bad-tasting when sprouted too long; they are best, and sweeter at a small tail. You decide. Taste test. My advice is to go with length of the berry or 1/4-inch tail.

Okay, here are the tails at Day 2 (in California winter time; summer, these grow faster and would be longer) …
kamut-berries_sprout_dy2

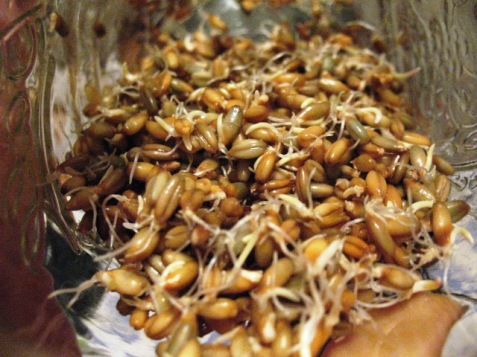
Rye Berry Sprouts: These came out perfect. As you can see, I did them in a jar. Small amounts are fine this way….
rye_sprouted_ready_rejuvelac-6

———–

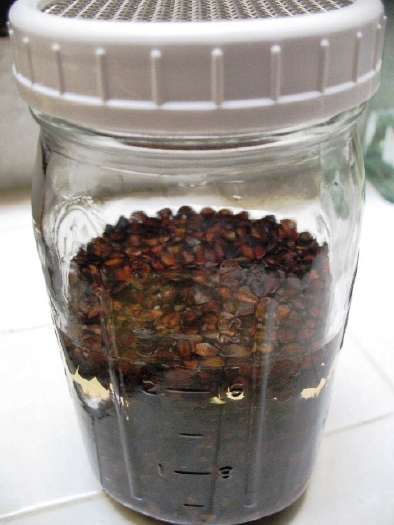
Jar method:

Soak (rinsed and drained) seeds/berries in a clean mason jar. Drain and rinse every 8 hours or whatever is specified for the particular seed you’re growing.ย  If you have a sprouter lid like this one…
buckwheat_unhulled_soak-7

Use it. (Sprout People have nice ones (the one above), which I prefer; I like the plastic bands — the metal rusts).

If not, some clean cheesecloth (found at any market) works great…

broccoli_sprouts_jar-cheesecloth-8

(The above are broccoli sprouts, which are obviously not what I’m discussing here; but the cloth top is to demonstrate; )

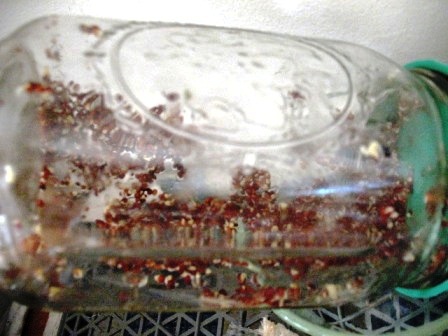
Lay it on it’s side so it continues to drain, has more space to breath, and is not sitting in a puddle.

Not the best pic…it should be facing down slightly more than in this pic to drain, as opposed to strictly on its side, if that makes sense…It should be at an angle…
broccoli_sprouts_1_m

I have put them in my sink dish rack to drain; that works great too ๐Ÿ™‚

Here’s some more good news: You don’t need a dehydrator tray (though, it’sย  nice and roomy) nor a jar and lid; you can sprout in a colander, preferably with lots of holes. Of course you still need to soak them somewhere — a bowl or any-‘ol jar will do.

While sprouts are growing, you must place a towel or newspaper over it in order to keep out light. Sprouts need darkness to grow (same for the jars). Procedure for green sprouts requires another step where it bathes in sunshine; but for grain berries, for our purposes, it only grows a small tail and will not grow to a green.

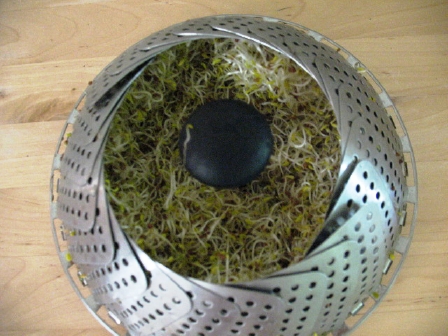
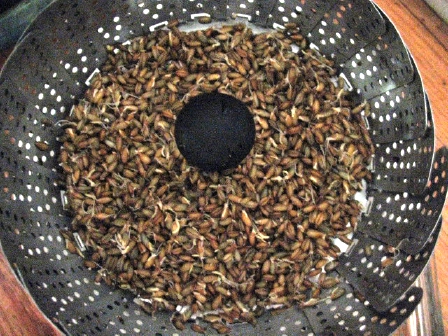
This is one of those ubiquitous steamer inserts! It has lots of holes for good air flow. It’s not a lot of room, but, if you’re making small amounts it works very well. These are ryeberries

rye_sprouting_strainer

To demonstrate that this does work, here are some pics of sprouts I grew to green on the steamer — alfalfa sprouts…
alfalfa_jar-to-strainer_

…and some clover sprouts!

clover_sprouts_fini-2

So, you don’t really need fancy equipment ๐Ÿ˜‰ . Especially, if you’re not growing loads (like I do!) Look around your home and you may find something similar to use.

For more on jar sprouting, visit this page at SproutPeople.

Okay, getting off track…I LOVE MY SPROUTS!!! ๐Ÿ˜€

~

Back to the Essene Bread…

Choose your berries and sprout, OR you can buy some in the refrigerated section of some markets (if you have a hippy-vitamin store they sometimes have some in the fridge sections too ๐Ÿ˜€ ).

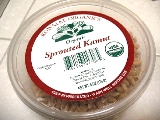
kamut_sprouts_package-2sm-copyThe pic to the left is a 6-ounce container of organic, sprouted kamut from Whole Foods; it cost $1.99 (a rip when you consider how VERY inexpensive it is to buy your own organic grain and sprout!)

=

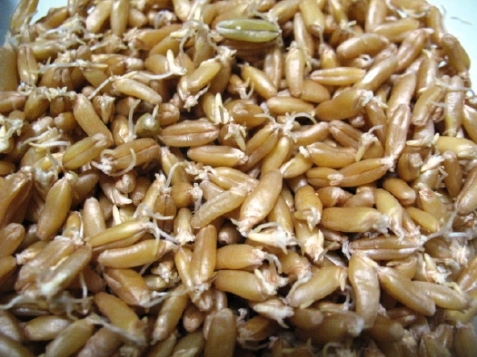
So organic Kamut, sprouted, for this recipe ๐Ÿ˜‰

kamut_berries_sprouts

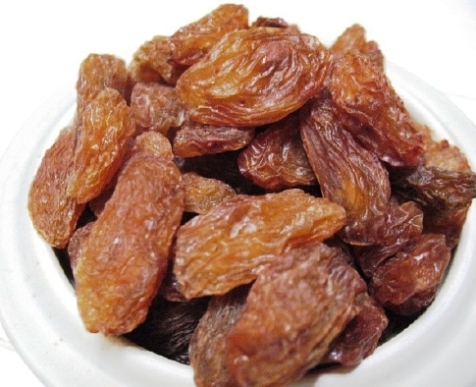
Look for these delicious Monukka raisins…
monukka-raisins-8

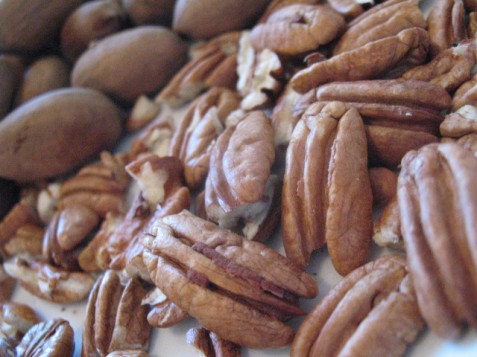
Pecans…

pecans_fresh-61

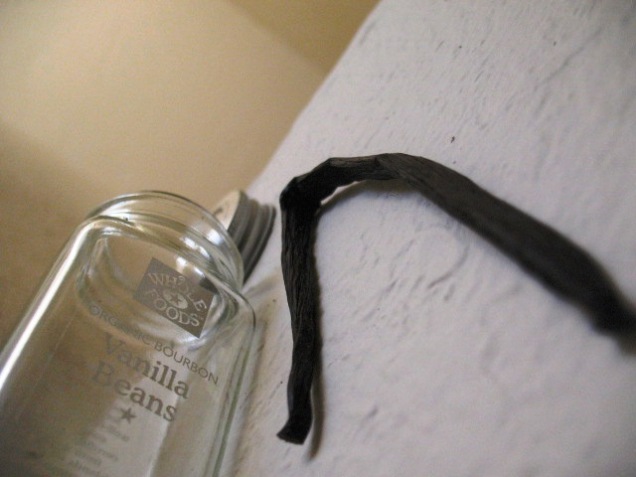
Some Vanilla…

vanilla-bean-22

…don’t worry, use extract ๐Ÿ˜‰

OPTIONALS:

Date Sugar:ย  ย  ย  ย  ย  date-sugar-sm-copy

Cinnamon/Spices

cinnamon_ground_halft-16-sm-copy

OR a Combo:ย  nuts/seeds, spices, dates, ground together (coconut) ๐Ÿ˜‰

pecans-date-sugar_ground_tribest-2-sm-copy


~ *** ~

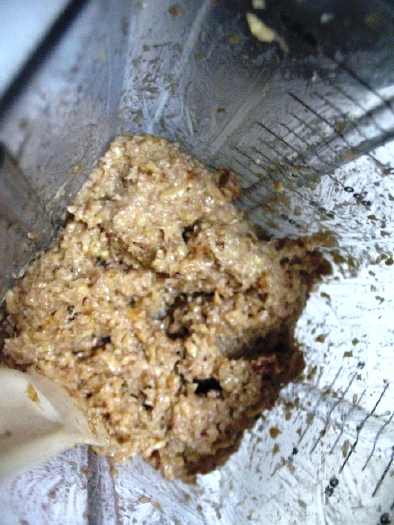
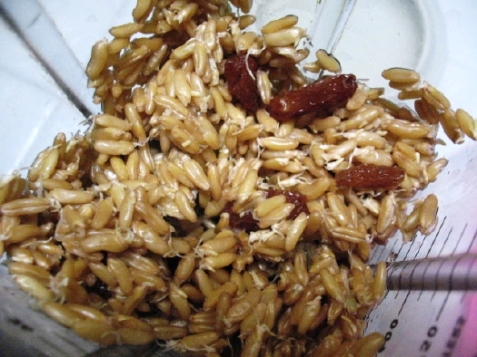
Just put berries, raisins, vanilla (not nuts or topping!) in the blender…
 

my_monukka_essene_bread


Pulsing helps draw it in…


my_monukka_essene_bread-2


Use your tamper or stop blender and use a spatula to get it moving…
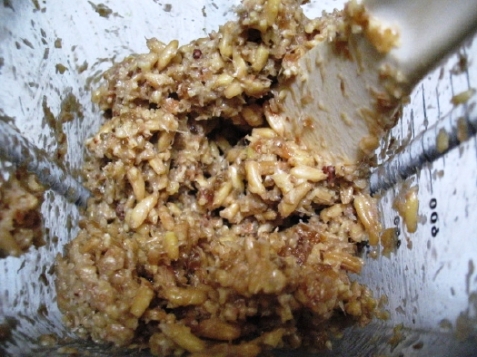


my_monukka_essene_bread-7


Coming along ๐Ÿ™‚


my_monukka_essene_bread-11


I stop here for texture; however, you should let it get to smooth as possible…
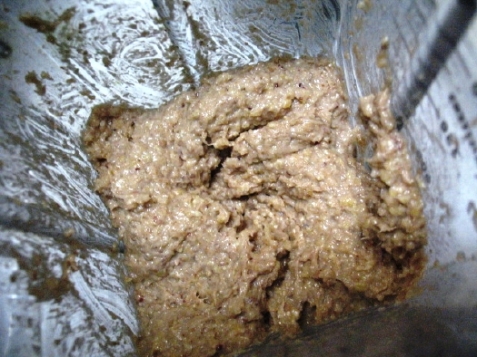
 

my_monukka_essene_bread-17


…and stir in by hand the finely chopped or ground nuts.

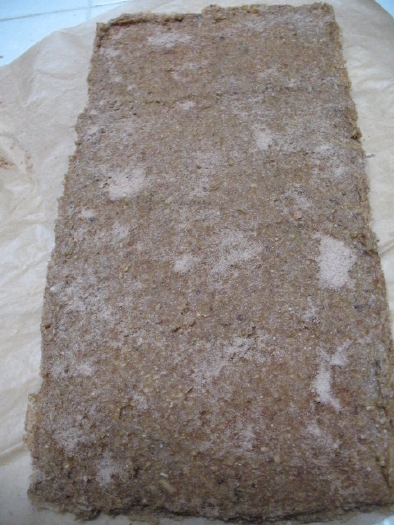
Spread onto parchment-lined dehydrator tray…
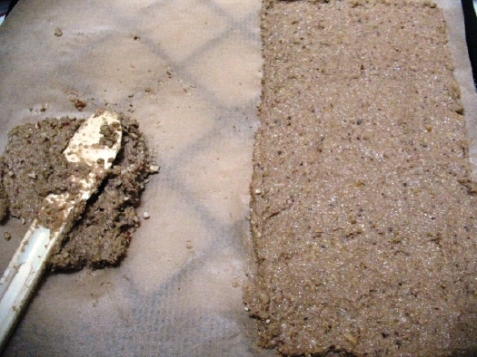
 

my_monukka_essene_bread-20


~


Sprinkle with topping, if using…


my-monukka-essene-bread_topping


`

Dehydrate or bake…


~


~ *** ~


The Recipe:
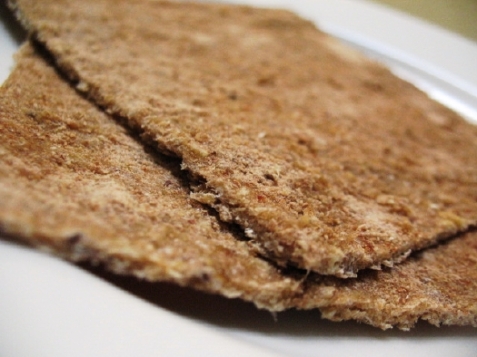


my-monukka-essene-bread_fini-492


My Monukka Essene Bread,ย  (basic, sweet version)

This is rated at light-medium-sweetness. For lighter sweetness, omit the dates (in the/or the) topping.

It has the intended chewy texture of classic Essene bread; however, you can adjust the texture to preference.

This is a raw-food Essene, but you may bake it at as low a temperature as you please in your oven, not to exceed 250-degrees to be considered an Essene Bread. You may, of course, do as you wish ๐Ÿ™‚

Vary the textures for variety; see notes.

6 ounces sprouted, organic Kamut Berries, whole (@ 1 1/2 C sprouted berries)

1/2 tsp Vanilla Extract

1/2 C Monukka Raisins, soaked and drained (or good-quality, super-tasting, sweet golden raisins (OR Dates, pitted)

Blend in a power blender till VERY smooth. You will see the gluten makes it a sticky dough. Do not add water, unless absolutely necessary; the grains should have enough, and the fruit as well.

Stir in by hand @ 1/4 C or more of finely chopped, minced, or ground Pecans

~

Spread evenly onto sheets to desired thickness.

You can sprinkle with a topping if you choose.

Dehydrate to desired texture.

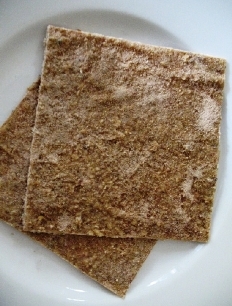
The above, took 2 hours in the dehydrator at maximum heat — 155-degrees —ย  to have a bendable texture; so good for a wrap or sandwich (or cookie). The thicker one took about 3 hours (see pics below).

I left the crackers go @ 6 hours — again, depends onย  how thickly you spread the dough and what texture you like. To test, just take out a piece and let it cool. Then taste for texture.

Note: If decide you should have added a topping to the recipe, but didn’t, you can still add it: Just spritz the top of your bread with a water bottle and then sprinkle with date sugar, date-nuts/seeds, or cinnamon-date sugar. Give it another light spray to make sure it sticks. Then, simply pop it back in to the dehydrator for a bit till dried. Voila! Fixed ๐Ÿ™‚

Cinnamon Date Sugar:

  • 1/4 C date sugar
  • 3/4 – 1 tsp Cinnamon, ground

Mix thoroughly. Store in a well-sealed.

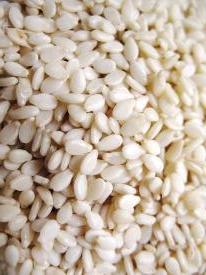
Sprout People has a good suggestion: sprinkle the pan with seeds or nuts to keep it from sticking. Sesame seeds are a great choice! Or dip your doughย  in a bowl of seeds to cover all sides. I’d just sprinkle them on top.
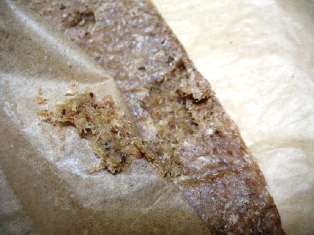
my-monukka-essene-bread_fini-7-copy

I just use parchment and it peels right off when cooled. The above pic shows what happens when you don’t let it cool first ๐Ÿ™‚ย  Use something because it will stick to the plastic mesh sheet of a dehydrator and not be easy to release. Alternatively, some dehydrators provide solid sheets for making fruit rolls and other sticky things; you can use that.

I’ve also used a silicone baking sheet in a pinch. Works great. There are small sizes available now, too. “Silpat” is the original, I think.

Temperature is up to you. You can make it “raw”; or bake it at a low temperature in your oven — the higher the temp, the more “enzymes” will be killed. (To avoid acrylamide formation, I would keep it under 248-degrees). It’s up to you. The ones in stores, unless specified, are usually heated above 250-degrees.

Oh, and by the way, if you want it “raw,” you should actually start off the temperature as high as it goes for at least the first 15 minutes to half an hour. Pre-heating the dehydrator helps, too. The reason, is that the wet loaf will not be anywhere near the high temperature for a while (especially the inside and the center); so it will still be raw. You also avoid it rotting! You won’t like that taste ๐Ÿ˜‰

So you see the advantages of making these into bread-like slices or like wraps, such as lavash or pitaย  — one being that the short dehydrating/cooking time doesn’t allow it time to get bad ๐Ÿ™‚ —ย  amongst other advantages. I never understood the little thick loaves…too raw on the inside and just too gummy. But that’s just me ๐Ÿ™‚ย  You can make little loaves, if you wish; just not too thick (high) and watch for fermentation by taste testing.
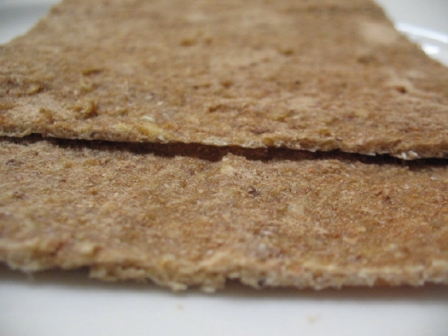


my-monukka-essene-bread_fini-56-copy


~ *** ~


Here is a picture of the thicker layer I mentioned…
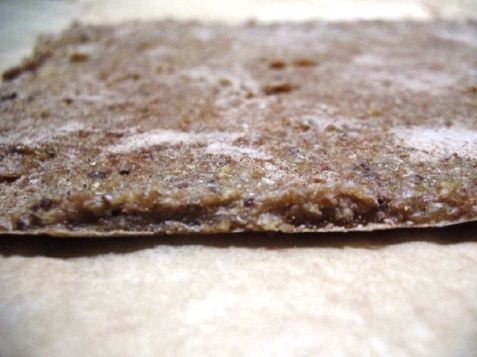
 

my-monukka-essene-bread_fini_thick


You can cut trim the sides to make it more even…
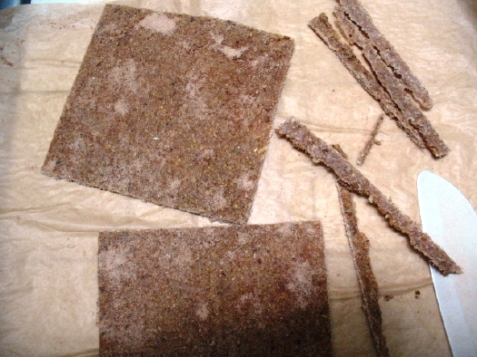


my-monukka-essene-bread_fini-12


Make little bread sticks ๐Ÿ™‚ Or dry for extended periods to make crackers…
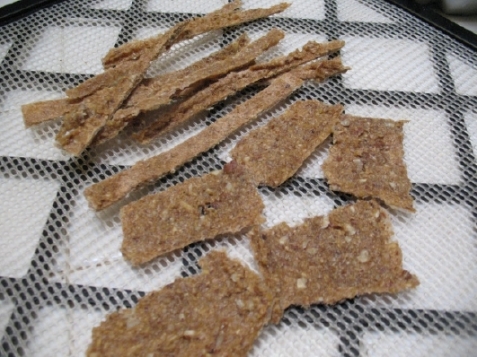
 

essene_monukka_crackers_sticks-2


…or till desired texture (to get a cookie-like texture and shape) ๐Ÿ˜€


* I asked Dr. Fuhrman if raw, dehydrated Essene bread is safe for children (and if dehydrating is okay and if baking is okay); his response:

“I don’t see any problem with some of that healthful bread for children after one year of age. Any way you prepare it is okay.”

So Good News! ๐Ÿ˜€ Another DPYC recipe!

~ *** ~


Here are pictures of kamut berries which I had sprouted, then dehydrated for long storage…


Properly (thoroughly) dehydrated grain sprouts lasts indefinitely…
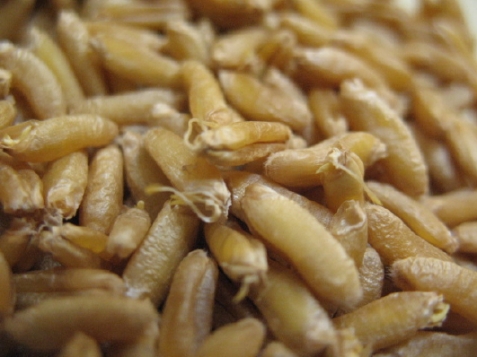
dried-sprouts_kamut-berries-14

I’ve stored them for years, and they are still excellent. Good for your earthquake kit or other kit custom to your location.

Also a possible traveling food…
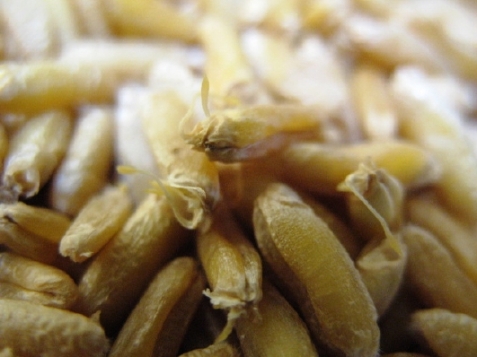
dried-sprouts_kamut-berries-19

Sprouted grain, by the way, is higher in protein and enriched through the sprouting process; so it itย  has lower starch and less carbohydrates.

To dehydrate, take care to do so at a very low temperature to preserve its nutritional value, but also to not burn the delicate little roots. Do not put them in the dehydrator wet; rinse them one last time and let them complete their final sprouting for the 8-12 hour period. Then pop them into the dehydrator at @ 90-degrees to dry. It won’t take long at all. Bite or cut through one or two to make sure it’s dry throughout. Store in a tightly covered glass container.

** ~ **
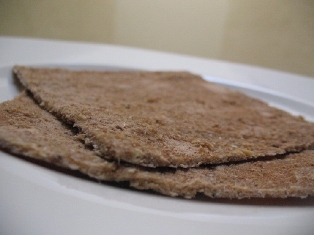
my-monukka-essene-bread_fini-39-copy2

So, barb, here’s the skinny:

Soak, drain, lay out to sprout and rinse every 8-12 hours some kamut or spelt berries till their tails are @ 1/4″

Dump ’em in the blender with some Monukka raisins and vanilla.

Blend, add nuts, Spread, Dehydrate or bake.

Done.

Voila!…Barbie Bread ๐Ÿ™‚

my-monukka-essene-bread_fini-16-copy

~~

Any sprouting question, just ask! I’m not an expert, but I’ve done lots…some of it documented here on my blog, so take a look around at posts from last year, and you’ll find lots of info; but absolutely feel free to ask. I’ve done some microgreens, and lots of sprouts ๐Ÿ˜€

Strix

Photobucket - Video and Image Hosting

Guest Review: Easy Green Sprouter

Red-Clover_SproutsRed Clover Sprouts

The Easy Green Sprouter

By Cindy

Ease of use:ย  Very easy to set up and use

Sprouting results:ย ย  All good results, even when sprouting broccoli seeds

Clean up:ย  Once per week cleaning required which takes aboutย  4 to 6 hrs
to complete.ย ย  It gets easier each cleaning and you don’t have to be home the whole time.

Value:ย  I feel it is a good value and worth the money I spent on it.

Seeds sprouted so far:ย  Wheat berries, barley, alfalfa, clover, broccoli and a few other tiny seeds (like alfalfa/clover) blends from Sproutman.

This allows me to sprout a lot more seeds than I had been able to.ย  I still use a few mason jars to sprout and recently bought more sprouting trays and stored those in a plastic storage bin.ย  I won’t know the results of this simple method for a few weeks yet so I can’t compare the two.ย  I can’t get enough sprouts and use them in my green smoothies too to that is why I need so many.

One thing I found that I don’t like is the tube that the water drains out of has a strange chemical smell to it and this smell transfers into the drained water also.ย  I plan on looking atย  hardware or home store to replace this tubing.ย  It doesn’t smell up the room, just the water that drains out of it.

Here is where I purchased it:ย ย  Evolution Health It is the best price I have found yet.

Update:

I want to add that since Sunday I have had seeds ofย  sprout trays in a plastic bin, hand watering and misting.ย  They are not sprouting nearly as fast as in the Easy Green Sprouter which makes me appreciate the Easy Green that much more.

Some of the seeds I am using in the Easy Green sprouter are from The Sprout House. They are the organic sunflower and buckwheat and I like them both.

Cindy

~ *** ~
Here is a video presentation of the Easy Green Sprouter

Thanks for the review, Cindy!

I love product reviews! Anyone has any reviews? Places? Products? Quality?ย  Send ’em— the good, the bad, and the ugly ๐Ÿ™‚

Poxacuatl

Photobucket - Video and Image Hosting

Random Sewing and Embroidery Projects…

I’ve discovered that storing sprouts (and produce in general) in my hempbags works great.

Sprout_hempbag_storage

Yes, that’s a (quasi)French Seam on a sprout bag!lol What can I say? Haha, I love me, my Frenchies. They won’t be breaking out of that bag anytime soon!

These are really good for keeping the sprouts from both drying out and getting wet and moldy. Is there anything hemp can’t do?!

Anyway, my Ooh-la-la sprout bag is full of sprouts ๐Ÿ˜€

Photobucket

I do a little embroidery on my hempbags, haha. Of course a little birdie is my favorite:

hempbag_birdie

Closer look at the little chirpie:

Photobucket


Another hempbag for storing sprouts

Photobucket


Photobucket

This is embroidery I did on another hempbag for storing my sprouty-sprouts ๐Ÿ˜€

Photobucket

Yes, it’s missing something, ha!

Ah, here we go :D:

hempbag_embroidery_sprouts

Fini!
hempbag_embroidery_sprouts

Just simple stuff. I’m nowhere near an expert on embroidery — obviously! There are some beautiful stitches, most of which I’ve not learned, lol. Some day, some day…

Here is a simple tote bag I made for shopping (it’s unlined), out of some lovely plain hemp fabric:

Photobucket

This is a dress I made for this past hot summer. I love this Japanese fabric! I screwed up on the straps, which you can’t see in this photo ;).ย  But it’s comfy and cool. I need to fix it, though (!)

Photobucket

Herr are some closeups of this fabric:

1

Ah, l love it:

2

Last year, I needed some new pin cushions, so I made this mega-mama globe one and two mediums out of scrap fabric:
pincushions

I had leftover fabric so made some summer hair bands (NOT head bands!lol)

Front/Top of head
Photobucket

Back/at the nape

Photobucket

Scrap fabric is great, by the way. When I go to a fabric shop, Iย  head toward the scrap bin and can find very good-quality expensive pieces marked down to 90%!ย  Of course, the pieces are cut and you need to consider that; but they are great for small projects. If lucky, you can find large pieces and make someย  great things out of fabric you’d never pay for at regular price! Bargain bins are awesome ๐Ÿ™‚

Pj shorts for hot summer nights. Kinda sloppy sewing job…but these are one of my favorites and most comfy
Photobucket

And speaking of scrap fabric…I got both these pink fabrics from the scrap bin. The lining was a real bargain. This bag holds some of my crocheting and embroidery tools and yarns, etc. I made this tote, lined with solid pink fabric; and a nice large pocket; a little embroidery; and used easy-peasy sew-on velcro for the closure… in retrospect, not the best choice! Ummm, yarns and embroidery floss sticks to it? HellO?!ย  lol. Oh, well, it works just great anyway ๐Ÿ˜‰

One side:

crochet_bag_pink_embroidery

The 0ther

crochet_bag_pink_embroidery

My artistic genius! …NOT


Speaking of not the best choice, Lol. I made this muslin (thank Goodness!) of a Simplicity pattern. Simplicity is anything but! I redeemed myself by being smart enough to make a muslin first and not waste good fabric. I liked the pattern, but Simplicity sizes really suck…for me, anyway. They don’t fit right. This dress design also didn’t look right on me. Perhaps, if I were a REAL seamstress, I could have fixed it; but I really didn’t like the empire band — or, I did like the band, just not the way it is sewn on to the dress. Hard to explain, but it just didn’t look right, once worn. It should be form-fitting in that area; but the band sort of hangs and is loose…

Anyway, I always make a muslin first! That’s the best lesson I ever learned about sewing, lol.

simplicity_3745_muslin

Oh, more jammies…one of my Halloween drawstring pants! Haha. Yes, I wore these around the house and to bed, of course. My kinda lingerie!

pumpkin-pjs
I love these comfy ones. They are thin flannel, which is perfect for California “winters.” It has just has a comfy simple elastic band — oh,and great color! ๐Ÿ˜€

pjs_green-flannel

One thing that is difficult to find is organic, environmentally friendly embroidery floss! It’s just not available, actually. I did a lot of research and contacted many manufacturers and there is no demand at this time — sadly ๐Ÿ˜ฆ There are, however LOTS of organic yarns! So for crocheting and knitting projects, it’s great (but expensive, of course).

What I did find which was AWESOME-awesome-awesome (!) was that NearSea Naturals sells a line of very thin “fingerling” hemp yarn.ย  They are all really gorgeous. I thought (hoped) that just maybe they’d be thin enough to use as embroidery…So, I ordered some samples of various vegan yarns…

samples of the hemp yarn:
hemp-yarn

Handspun Sari recycled yarns:
sari

This is banana “silk,” which is also vegan:
Banana-Silk

Unfortunately the banana and sari don’t work well for embroidery! lol. But the fingerling hemp yarns were a score! They are, of course, a bit rougher; but that rustic feel and look is just fine, and not really noticeable unless you’re really looking close. They lack the shine of regular floss, but that’s not a big deal to me. I think my embroidery above looks just great and doesn’t need to be flossy ๐Ÿ™‚

I’ve not worked with the Sari or banana “silk,” but would like to get to it someday. All of them are just beautiful.

NearSea also has beautiful organic cotton yarns. I got the golden to crochet a throw blanket. It’s gorgeous yarn:

golden_yarn_closeup

Much thicker than I anticipated:

golden-yarn

Unfortunately, lots of unevenness:
golden-yarn_uneven

and knots, Ugh!

golden_yarn_knots

Still, I’m planning on ordering more in the other colors :). I believe I may have found them at a lower price; I’m sure I bookmarked it somewhere. The colors are stunning. Nothing beats the beauty of natural and organic wares ๐Ÿ™‚

Strix

Photobucket - Video and Image Hosting

Clover Sprouts in the Hemp Bag and Noodles’ Eco-Suits …

Of course came out fabu-loso ๐Ÿ˜‰

Here are the Red Clover seeds soaking (yes, those are shoelaces for string! It is hemp, though ๐Ÿ˜› ):

Photobucket - Video and Image Hosting

Okay, so after a good 8- to 12-hour soak, it’s now it’s hang time.

Then…Day 1:

Photobucket - Video and Image Hosting

This is how I rinse: I add the bag to a bowl of water and swoosh and shake and submerge so ALL the sprouts get a nice soaking. I do this instead of running tons of water over them — WASTING!! This works fantastic and saves me some angst! I really, really, really — did I mention, “really”? — despise wasting water.

Photobucket - Video and Image Hosting

Day 2 — Gorgeous! I think Red Clover seeds are the most beautiful, don’t you?

Photobucket - Video and Image Hosting

Photobucket - Video and Image Hosting

Photobucket - Video and Image Hosting

Ahhhh, Day 3:

Photobucket - Video and Image Hosting

Photobucket - Video and Image Hosting

Mmmmm…Day 5. And, wow…greening, once again before even “greening”!!:

Photobucket - Video and Image Hosting

Here is the bag of sprouts, done, on Day 6 (Now I know I can use a bit more seeds next time since this is not too full): Note how dry the bag is…

Photobucket - Video and Image Hosting

Okay, now let us peak inside…

Photobucket - Video and Image Hosting

Eureka!

Photobucket - Video and Image Hosting

Once again, niiiiiiiiice ๐Ÿ˜€

Photobucket - Video and Image Hosting

Photobucket - Video and Image Hosting

Photobucket - Video and Image Hosting

Obviously this type of sprout also excels in hemp bags!

***********

Now, I read that some seeds, like red clover sprouts release quite a bit of their pigment on to their host. So I expected my bag to stain, and it didn’t disappoint :). I think it looks nice, actually; I love antiques and antiquey things, especially fabrics! So this looks like a “well-seasoned” sprout bag ;^).

Photobucket - Video and Image Hosting

Photobucket - Video and Image Hosting

Photobucket - Video and Image Hosting

000000000000000000

****

This is just another small-ish hemp sprout bag I made; I want a separate one for alfalfa sprouts:

Photobucket - Video and Image Hosting

Photobucket - Video and Image Hosting

I also made some re-usable tea bags like I had purchased previously (some are really cheapy; some are good-quality) with the scraps of fabric leftover from making the hemp sprouter bags ๐Ÿ˜€ :

Photobucket - Video and Image Hosting

And this is a large-ish filter made from the hemp jersey for volume tasks, such as for seed mylks or juices, etc.

Photobucket - Video and Image Hosting

Photobucket - Video and Image Hosting
This particular fabric is so gorgeous I almost hate to use it! The picture at Near Sea Naturals and these photos, too, don’t do it justice; if I didn’t know better, I would say it was a blend with silk! It has that type of drape, feel, and look.

I got the ring from the large re-usable cotton tea nets I bought which wore out; no use throwing away those good rings! They fit nicely. ๐Ÿ˜€

********

Now for another Noodles layout ;^)

Here he is in the bird suit made from the cool, cotton-like fabric, “Natural Hemp-Organic Cotton Muslin” that I used to make the sprout bags:
Photobucket - Video and Image Hosting

Photobucket - Video and Image Hosting

And here is a suit in the drapey, very light — I hate to even use the word, “jersey”! — Hemp-Organic Cotton jersey fabric:

Photobucket - Video and Image Hosting

Here is a nicer closeup of the fabric:

Photobucket - Video and Image Hosting

But, of course, nudie is always better ;^)

Photobucket - Video and Image Hosting

I still have to make him one in the other gorgeous jersey, the FeatherweighNatural Hemp-Organic Cotton Jersey.

I just love the naturalness of these fabrics! Knowing there is nothing synthetic or poisonous is a very good thing, indeed. :^)

Strix
Photobucket - Video and Image Hosting

Pot-Growing Veggies

So here are my potted greens growing on my balcony. Doing very well. I wasn’t sure if they would. Only question now is WHEN & HOW to harvest?!?!! I don’t know if I need to pull, cut, hack or what. And are these supposed to be harvested to continue growing or is this all I get? A one shot deal?? green sad big

Behold, the King of Kruciferae, the Mighty KALE:

Kale 2

Here’s Kale shortly after transferring its new home, straight from the farmer’s market:

Baby Kale:

Photobucket

The Other Calcium PowerHouse from the Family Choi of Cruciferae, Baby Pak:

bok 2

Here it is on its homecoming, Baby, Baby Pak Choi:

Photobucket

Another CalciYUM-rich green, commonly disparaged as a “weed,” The Dandiest of Dandies, meet THE DANDELIONS (with a little bok in there):

Bok Dandelions 2

Baby’s Arrival, THE DANDELIONS:

Photobucket

Pox_Large row smiles